00
Days
: 00
Hours
: 00
Mins
: 00
Secs
Shop Now close button

Latest insights

How to Clean a Vacuum Cleaner: Complete Step-by-Step Guide

How to Clean a Vacuum Cleaner: Complete Step-by-Step Guide

Is your vacuum not cleaning as well as it should be? It could be dirty. If it needs cleaning, your vacuum might not work as designed, leaving behind dust and allergens that compromise the health of your home. It can also mean a waste of your valuable time. The good news is that the advanced vacuums of today have self-cleaning functions, but every vacuum benefits from a periodic deep clean. Start by knowing what type you own and what’s washable. What Type of Vacuum Cleaner Do You Have? While some vacuum models offer automatic cleaning, others need to be buffed-out manually. You are likely already aware of the type of vacuum they have, but if in doubt, check your user manual. The cleaning process varies according to type: Upright and stick vacuums: Empty bag/dustbin, clean or replace filters, and remove hair from the brush roll.  Canister vacuums: Empty bag/bin, clean filters and canister, check/clear hose and wand. Robot vacuums (with/without docks): Such as the Dreame L40s Ultra, offer self-cleaning functions, but still require occasional hands-on maintenance to empty the bin and clean sensors. Wet-dry vacs: Empty/winse the tank and clean/replace filters; advanced models are largely self cleaning, using a scraper to eliminate tangled hair or threads and automatically sanitizing the brush head and fittings with hot water.  Tools and Prep for Cleaning Your Vacuum To unlock your vacuum cleaner’s full potential, gather essentials for a seamless refresh. You'll need: A small brush or crevice tool (often found right on your vacuum itself)  A pair of scissors to snip away tangled hair A canister of compressed air to blast dust away  A microfiber cloth for a sparkling finish.  Mild soap and water for washable parts.  Prep first: Unplug or power off. Empty the bin outdoors to keep dust/allergens out of the room Identify washable vs. dry-wipe parts (never wet electronics or sensors) How to Clean Your Vacuum Cleaner Properly Giving your vacuum a thorough cleaning can make a world of difference. When you're ready to restore its suction and extend its lifespan, follow these simple steps. Step 1: Empty the dustbin, water tank, or replace the bag A full bag or canister restricts airflow, and that makes your vacuum work harder and clean less effectively. For bagless models, empty the contents into a trash can outside. Step 2: Clean the filters Your vacuum’s filter is a hero in the saga as it traps fine dust and allergens. A clogged filter also chokes the motor and kills suction power. To keep it in top running order, be sure to clean or replace your vacuum’s dirty filters. By following the steps below, you'll ensure your vacuum is ready to tackle any mess,ensuring you a truly pristine home and a healthy living environment.  For a bagless vacuum with a reusable filter: Remove the filter and tap it gently over a trash can to dislodge caked-on dust. If it’s a washable filter, use cool water to rinse away the dirt. Make sure it's completely dry before reinserting it—this can take up to 24 hours. For a bagged vacuum with a filter: Most bagged vacuums have a filter you can replace. Refer to your owner’s manual for the correct replacement part. High-efficiency particulate air filters (HEPA) are used in advanced vacuums so they can trap very tiny particles. Clean them with cool water according to guidelines in the user manual. Step 3: Clean the vacuum cleaner brush and roller A brush roll tangled with hair and string can't pick up debris. If your vacuum is not self-cleaning and clearing, use a pair of scissors or a seam ripper to carefully cut and remove any tangled fibers. You can also wipe the brush with a damp cloth to remove any caked-on dirt.   Dreame Take We design our vacuums to cut down manual cleanup, so this step becomes the exception, not the rule. We engineer anti-tangle brushes to stop hair wraps before they start, and our dock hot-washes and dries the mop so you’re not hand-scrubbing pads.   Step 4: Clean the hose and attachments A blocked hose or attachment can be a major cause of lost suction. Use a broom handle or another long, slender object to push out any clogs. For more thorough cleaning, a gentle rinse with warm water can do the trick. Make sure everything is completely dry before reattaching it to the vacuum. Step 5: Clean the vacuum's body and sensors Use a soft, dry cloth to wipe down the exterior of the vacuum. If you have a bagless vacuum, use the crevice tool to gently clean the sensors on the dustbin and the body of the vacuum. This ensures that the vacuum can accurately detect how full the dustbin is and continue to function properly. How Often Should You Clean a Vacuum Cleaner? Regular cleaning of your vacuum cleaner is crucial to maintaining its power and effectiveness. It's not hard to do and makes a world of difference! Maintenance schedule Action Frequency Empty the dustbin or bag After every use or when it's two-thirds full. For pet owners or during allergy season, it's best to empty it after every cleaning. Clean the filter Washable filters: Every 1-3 months. Non-washable filters: Check monthly and replace as needed, or every 6-12 months depending on usage. Clean the brush and roller Once a month for most homes. If you have pets or long hair, you may need to clean it every two weeks.  Clear the hose and attachments Once a month or as needed if you notice a drop in suction or a clog. Clean the body and sensors Sensors: Once a week for robot vacuums to ensure accurate navigation. Choose Vacuum Cleaners That Save You the Work Today’s high-tech appliances have transformed home cleaning and routine chores by even cleaning themselves. Here are a some vacuums that truly save you the work: The Dreame L40s Ultra robot vacuum and mop elevates your cleaning experience with its advanced auto mop washing and drying system. This feature ensures the mop is always fresh and ready, delivering a superior, hands-free clean that leaves your floors sparkling. The Dreame H14 Pro wet-dry vacuum redefines hygiene with its automated self-cleaning cycle. It uses hot water to rinse the brush and internal pipes and then uses hot air drying, guaranteeing a pristine, odor-free device after every use. Another advanced design that makes your life easier is the Dreame Z30 cordless stick vacuum. Cleaning it is an absolute breeze! FAQ Is a self-cleaning vacuum worth it? If you value low upkeep, yes. A self-cleaning vacuum offers unparalleled convenience, saving you valuable time and effort on maintenance.  What vacuums self-clean? Some high-end robot vacuums and certain upright vacuums feature self-cleaning brushes, auto-empty docks, detangling brushes, and hot-wash/dry maintenance. Check the feature list for your exact model. How to clean a vacuum cleaner that smells? To eliminate unpleasant odors, start by thoroughly emptying the dustbin and washing or replacing the filters. For a refreshing scent, sprinkle a small amount of baking soda inside the empty dustbin before your next use. Can I use my vacuum right after cleaning it? No. Before using your vacuum again, you must ensure all washed components, such as filters and dustbins, are completely dry. This simple step prevents mold growth and protects the motor, ensuring your vacuum performs flawlessly for years to come. What is the difference between a stick and wet-dry vacuum? A stick vacuum is lightweight and best for quick cleanups on hard floors, while a wet-dry vacuum is larger and designed for both liquid spills and heavy debris. Choose based on your floors and routines. Conclusion A consistent cleaning routine is the simplest way to extend the life and performance of your vacuum cleaner. To keep your home pristine, enjoy the convenience of auto-cleaning vacuums. These revolutionary devices offer unparalleled ease in floor care, ensuring you always have a fresh, tidy living environment.
View more
How to Dispose of a Vacuum Cleaner (2025 Guide for Homes)

How to Dispose of a Vacuum Cleaner (2025 Guide for Homes)

Got an old or broken vacuum sitting in your closet? You’re not alone. Every year, millions of vacuums end up in landfills, even though most contain plastics, metals, and electronic parts that can be recycled. In many U.S. states, tossing vacuums in the trash is discouraged or even restricted under e-waste rules. Responsible disposal protects the environment, and in some cases, it can even save you money through recycling credits or trade-in programs. This guide breaks down how to dispose of a vacuum cleaner properly in 2025, plus what to consider if it’s time for an upgrade. Can I Throw Away a Vacuum Cleaner? Short answer: No. Here’s why: Environmental concerns: Vacuums contain electronic boards, wiring, and plastics that take decades to break down. Recycling value: Motors, aluminum, and copper parts can be salvaged. Possible savings: Donation or resale may give your vacuum a second life or help you earn trade-in credit. Best Ways to Dispose of a Vacuum Cleaner Here are the most practical, eco-friendly, and legal options in the U.S. 1. Recycling Centers Most local recycling programs accept small appliances, including vacuums, through e-waste drop-offs. Where to check: City or county websites. Retail events: Best Buy and Home Depot often host electronics recycling events.   Pro-tip Call ahead, as some centers only accept certain vacuum types.   In some cities, you may need to pay a small handling fee (often $10–$20), while others offer free e-waste days where vacuums and other electronics are accepted at no cost. Certain states like California, New York, and Illinois have stricter e-waste recycling laws, which means residents have more accessible drop-off options. If you’re unsure where to start, sites like Earth911.com provide searchable tools to find local recycling centers that accept vacuums and small appliances. 2. Manufacturer & Retailer Trade-In Programs Some manufacturers and retailers offer trade-in or recycling credits when you bring in old electronics. While Dreame doesn’t currently run a U.S. trade-in program, it’s worth checking big-box stores in your area. How do trade-in programs usually work? You bring your old appliance to a participating store, and in return, you may receive: A gift card toward a new purchase A percentage discount on a replacement device Free safe disposal and recycling of the old unit For example, electronics chains sometimes host seasonal trade-in events where you can drop off multiple items at once. Even if no credit is offered, these programs ensure your vacuum is recycled responsibly. 3. Sell or Give Away If your vacuum still works, someone else might want it. Platforms like Craigslist, Facebook Marketplace, or Freecycle make it easy to sell or give away. Students, first-time renters, or budget-conscious families often look for gently used appliances. When listing online, be upfront about your vacuum’s age, condition, and any quirks (like a noisy motor or missing tool). Even “for parts only” vacuums can sell, as repair enthusiasts or DIYers may want motors, cords, or brush rolls. Adding a few clear photos can speed up the process and help your item move quickly.   Dreame Take If your current vacuum is wearing out, upgrading to a modern Dreame robot vacuum can save you time and give you a deeper, more consistent clean.   4. Donation Still functional? Donate it to a local shelter, thrift store, or community center. For more details, check Dreame’s blog: How to Donate a Vacuum Cleaner: 101 Guide. Donations aren’t just helpful for households; they also support job training programs. Some nonprofit thrift chains employ people who refurbish donated electronics before resale, creating local employment opportunities. If your vacuum is lightweight or cordless, consider donating it to senior centers or assisted living communities, where easy-to-handle devices are especially valued. 5. Scrap Yards & Parts Salvage If your vacuum is broken beyond repair, scrapyards may take it for metal parts. Some repair shops also buy working motors or batteries. Vacuum Disposal Method Best For Key Benefit Recycling Centers Broken vacuums Eco-friendly, easy drop-off Trade-In Programs Old but working vacuums Possible store credit Sell/Give Away Functional vacuums Earn cash or help others Donation Gently used models Supports communities Scrap Yards Damaged units Salvage valuable parts This route may not put cash in your pocket, but it ensures your vacuum doesn’t end up as landfill waste. Prep Checklist (Before You Sell, Donate, or Recycle) Unplug & power down. Remove the battery (if user-removable) and place it in approved battery recycling—never household trash. Empty the bin/bag and tanks; wipe external dust. Factory reset robot vacuums to clear Wi-Fi and maps (privacy). Bundle accessories (charger, filters, brushers) to increase reuse value. When to Upgrade Your Vacuum How do you know it’s time to replace rather than repair? Look for these signs: Weak suction even after filter changes Constant repairs or motor issues Broken attachments or worn hoses Excessive noise or overheating   Dreame Take Sometimes, disposal + upgrade = smarter choice. Instead of fixing an old, inefficient vacuum, moving to a newer model can mean less waste and more value long-term.   Here’s a quick upgrade checklist: Your home has grown (bigger space, more rooms). You’ve added pets (and pet hair is everywhere). You or a family member has developed allergies. You travel often and want cleaning handled while you’re away. If you check two or more boxes, it may be time to upgrade. How to Choose Your Next Vacuum Not all vacuums are created equal. Here’s what to consider before buying: Floor type: Hardwood, tile, or carpet? Uprights handle carpets well, while robot vacuums and cordless sticks shine on mixed flooring. Home size: Small apartments may only need one compact robot vacuum, while multi-level houses benefit from stronger models with docking stations. Lifestyle needs: Got pets? Look for models with high suction and tangle-free brushes. Have allergies? Prioritize vacuums with HEPA filters and strong dust containment. Budget: Decide upfront. Options range from budget-friendly cordless vacuums to advanced robots with self-cleaning docks. Extra Tips Before Buying: Check noise levels: If you live in an apartment, you’ll want something quieter, like a robot vacuum with a “Quiet Mode.” Think long-term: Some vacuums reduce costs by offering washable filters and reusable mop pads. Smart features: Look for models compatible with Matter, so your vacuum integrates seamlessly into your smart home setup. Maintenance costs: Bags, filters, and replacement rollers add up; factor them into your budget. For a deeper breakdown of floor-type matching, pet needs, and more, see Dreame’s blog: The Complete Robot Vacuum Buying Guide. What Improvements You’ll Notice With Modern Vacuums New vacuums, especially robot vacuums, offer major upgrades. These include: Stronger suction: Handles pet hair, crumbs, and dust with ease. Obstacle avoidance: Smarter navigation reduces collisions and missed spots. Health perks: HEPA filters reduce allergens and improve air quality. Time saved: Automation means your floors get cleaned while you relax. Households that switch from upright vacuums to robot vacuums often report saving hours each week on cleaning. Instead of pushing a vacuum around daily, a robot handles routine floor care automatically, freeing up time for work, family, or relaxation. Pairing a robot vacuum with an air purifier can also improve indoor air quality, reducing dust and allergen buildup. Vacuum Cleaners to Explore in 2025 Looking to upgrade? Here’s how Dreame’s 2025 lineup stacks up across key features, so you can choose the right fit for your home. Dreame X50 Ultra Dreame X40 Ultra Dreame L40 Series Best For Flagship powerhouse Large homes Apartments & smaller spaces Suction Power Up to 12,000 Pa Up to 10,000 Pa Up to 8,000 Pa Mop Self-Cleaning ✅ Yes ✅ Yes ✅ Basic pad cleaning Self-Emptying ✅ Yes ✅ Yes Optional dock Dirt Detection ✅ Smart dirt detection ✅ Dirt-level adjustment ❌ (Manual scheduling) Obstacle Avoidance AI-powered 3D obstacle avoidance Laser + 3D obstacle avoidance LDS laser navigation Voice Control ✅ Alexa & Google ✅ Alexa & Google ✅ Alexa & Google Key Features AI navigation, self-wash/dry dock, premium all-in-one cleaning Strong suction and mop combo, great for large households Compact, budget-friendly, reliable daily cleaning FAQs Q: What to do with an old robot vacuum? A: If still functional, donate or resell. If broken, recycle through e-waste centers. Q: How to dispose of a vacuum battery properly? A: Remove the battery and drop it at a Battery Recycling Center. For more info, read: How Long Do Robot Vacuum Batteries Last? Q: Can I put a vacuum in regular trash pickup? A: Not recommended. Always check your city’s e-waste policy. Q: Is it worth repairing an old vacuum? A: If repairs cost more than half the price of a new one, upgrading is smarter. Final Thoughts Don’t just toss your vacuum in the trash; it’s harmful to the planet and a missed opportunity for recycling, donation, or resale. When the time comes to upgrade, modern vacuums, like the Dreame X50 Ultra, X40 Ultra, or L40 Series, offer cleaner floors, fresher air, and more free time. Responsible disposal = cleaner homes, a cleaner environment, and a smarter lifestyle.
View more
Do Robot Vacuum Size and Shape Matter? How to Pick the Right Model

Do Robot Vacuum Size and Shape Matter? How to Pick the Right Model

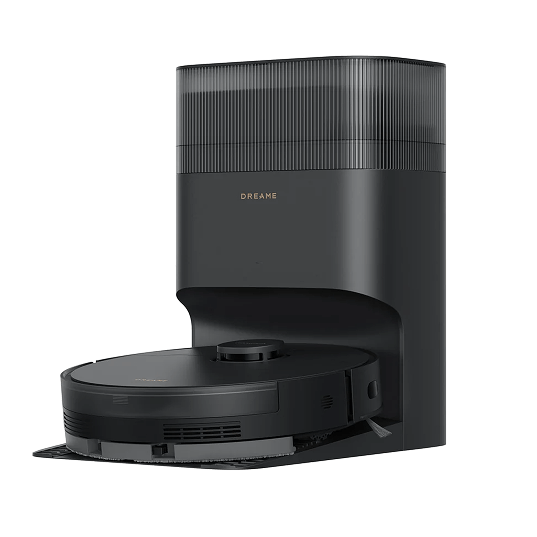
When shopping for a robot vacuum, size and shape often get overlooked. Many people focus on suction power or app features without realizing that the vacuum’s height, width, and design can affect how well it navigates and cleans in real homes. In this guide, we’ll show you how vacuum robot size and shape impact cleaning performance. You’ll learn what to measure before buying, how different shapes perform in corners, what dock size means for placement, and which models fit your lifestyle. By the end, you’ll know exactly what to expect when choosing your next robot vacuum. Why Robot Vacuum Size Matters Ignoring the dimensions of a robot vacuum is like buying a large appliance without measuring your kitchen doorway. It might not work where you need it to. Here’s how each measurement impacts performance: Height: Determines whether the robot vacuum can clean under sofas, beds, and cabinets. Diameter: Affects maneuverability around chair legs, narrow hallways, and kitchen islands. Ground Clearance & Wheel Travel: Impacts how well it climbs thresholds, rugs, and uneven floors. Bin/Tank Capacity: Larger robot vacuums often have bigger dustbins or water tanks, reducing how often you need to empty or refill. Dock Footprint & Height: Don't forget where the vacuum lives! Important for small apartments or tight hallways where space is limited. Here’s a quick overview: Size Factor Why It Matters Example Height Reaches dusty spots under low furniture Fits under a 4in (10cm) sofa Diameter Navigates tight spaces more easily Maneuvers between dining chairs Clearance Handles rugs and thresholds Crosses a 0.8in (2cm) lip Capacity Longer runs without emptying Holds more pet hair in multi-pet homes Dock Size Placement flexibility Fits in a pantry or corner   Pro-tip If you live in a compact apartment, a smaller vacuum might be the better choice. For bigger homes, a larger model with a bigger dock may save you time.   Shape Matters Too: D-Shaped vs. Round Robot Vacuums Shape isn’t just about looks; it impacts how well the vacuum cleans edges and corners. Here’s what to consider: Round Robots: The common, classic design. Excellent at all-direction navigation, avoiding obstacles, and turning in tight spaces. But they can struggle in sharp corners. D-shaped Robots: These have a flat edge on one side. The primary benefit is that this flat side allows them to get significantly closer to walls and into room corners. Slightly bulkier, but better at edge and baseboard cleaning. Shape Advantages Considerations Round Easy maneuverability and compact May miss sharp corners D-shaped Strong edge/corner cleaning Slightly bulkier, can snag in narrow areas   Dreame Take We’ve moved beyond D-shaped bodies because a round design navigates more smoothly in real homes. To solve corners, we engineered extendable mop arms and edge brushes that reach right up to the baseboards. This way, you get the best of both worlds: the agility of a round robot vacuum with the precision to clean every edge and corner.   What Is a Good Height for a Robot Vacuum? An ideal height for your vacuum is one that enables it to fit under your furniture. This measurement is crucial. Even a difference of half an inch can determine whether your vacuum cleans under your sofa or keeps skipping it. Under 3.94in (100mm): Fits under most sofas, beds, and TV stands. Best for deep dust bunnies. 3.94-4.13in (100-105mm): Standard height for many LDS (LiDAR-based) vacuums. Still clears most furniture, but you must measure first. Dynamic/Liftable LDS Sensors: Some models lower their sensors during cleaning. Always check the maximum height to be safe. The Rule of Thumb: Your furniture's clearance should exceed the robot vacuum's height by at least 0.2 inches (5 mm). More is better if your floors are uneven.   Pro-tip Always measure before buying. Many returns happen because users discover their robot doesn’t fit under their couch. Spending two minutes with a tape measure prevents weeks of frustration.   Are Small Robot Vacuums Any Good? Yes, especially for apartments and tight layouts. Low profile (≤ 4in / 100mm) means they slip under more furniture. Standard diameter (~13.8 in /350 mm) is compact enough for most apartments. Quieter modes are useful in shared living spaces. Compact docks make placement easier. But the real test isn’t size alone; it’s navigation and mapping. A “mini” robot vacuum without smart navigation won’t be as effective as a slightly larger model with LiDAR and accurate mapping. For more on this, see our dedicated blog: Robot Vacuums for Small Spaces and Tight Layouts: Are They Worth It?   Pro-tip If you live in a studio or one-bedroom apartment, focus less on suction numbers and more on navigation. A smaller robot with reliable mapping will outperform a large, powerful model that gets stuck in tight layouts.   Consider Dock Size (And Where It Will Live) The dock is just as important as the vacuum itself. Many docks today are more than just chargers; they’re cleaning stations that wash, dry, and empty your vacuum automatically. Here’s what to consider: Floor Space: Allow 12–20 inches (30–50cm) clear in front of the dock for the vacuum to park accurately. Side Clearance: Leave at least 4 inches (10cm) on each side for ventilation and access. Overhead Clearance: Remember that lids open upward, and tanks pull out. Make sure there's nothing above the dock. Accessibility: Pick a spot where you can easily service the dock weekly (empty the bag, refill water and cleaning solution) without having to move furniture. Wi-Fi: Place within strong 2.4 GHz coverage. The Dreame X40 Master is a great example of a smaller dock design. It fits neatly into apartments where space is limited while still offering advanced features like mop washing and dust collection.   Important Don't place your dock near heaters, in direct sunlight, or next to heavy foot traffic. A stable, low-traffic corner with good Wi-Fi coverage works best.   Match Vacuum Robot Size to Your Lifestyle Your choice should reflect your living situation. Here’s a breakdown: Pet Owners: Prioritize a low-profile model to clean under furniture where hair gathers and a large bin capacity to handle the extra debris. Families: Look for a model that can handle thresholds between rooms and has a sturdy build to survive toys on the floor. A large water tank for mopping models is also a plus for sticky messes. Small Apartments: A compact model with a small dock footprint is key. Excellent navigation is critical to cleaning efficiently in a confined space. Homes with Split-Levels or High Thresholds: Ground clearance and powerful wheels are non-negotiable. Check product specifications and reviews to see obstacle-crossing height. For a deeper dive into how advanced features can elevate your cleaning, read our Dreame X50 Ultra Review.   Pro-tip Think about your most annoying cleaning spot; maybe it’s pet hair under a couch, dust under a bed, or crumbs around kitchen table legs. Match the vacuum’s size to that challenge, and you’ll get the most satisfaction.   FAQs Q: Does vacuum robot size really matter for cleaning performance? Yes. Size affects clearance, bin capacity, and navigation. A too-tall robot will skip low areas, while a too-small one may have limited battery or suction. Q: What is the average height of a robot vacuum? Around 3.9–4.1 inches (100–105 mm). Q: What’s the best robot vacuum size for small spaces? Low-profile models under 4 inches (100 mm) with compact docks. Q: Which vacuum robot size is best for large houses? Bigger models with stronger suction, larger bins, and advanced docking stations. Q: How do I know if a robot vacuum will fit under my furniture? Measure your lowest clearance (like a sofa base) and compare it with the robot’s height. Allow at least 0.2 inches (5 mm) extra. Q: Should I prioritize shape or size when choosing? Both matter. Size affects fit and capacity, while shape influences how well the vacuum handles edges and obstacles. Final Thoughts When it comes to robot vacuum size, there’s no one-size-fits-all. Measure your furniture, consider your lifestyle, and think about dock placement before choosing. A robot vacuum that fits under your sofa but gets stuck at thresholds won’t serve you well. Similarly, a compact model may be perfect for an apartment but insufficient for a big, busy household. By taking a few extra minutes to consider size and shape, you’ll buy once and enjoy seamless cleaning for years. Whether you pick a compact Dreame L40s Ultra for a city apartment or a feature-packed Dreame X50 Ultra for a family home, the right fit makes all the difference. And if you’re still exploring your options, our guide on choosing the right robot vacuum is another helpful resource.
View more
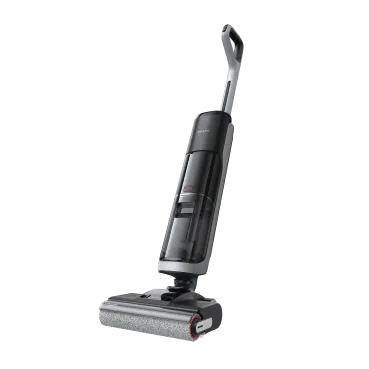
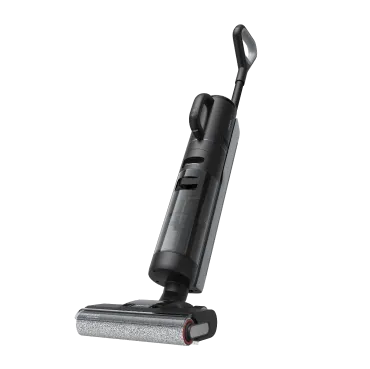
How to Use a Wet Dry Vac for Water — the Definitive Guide

How to Use a Wet Dry Vac for Water — the Definitive Guide

A freezer defrosting into a puddle across the kitchen floor is more than just an inconvenience—it's a cleanup challenge. You might instinctively reach for a mop, but a wet/dry vacuum is faster, safer, and more thorough for liquid pickup. This versatile appliance is specifically engineered to handle both dry debris and liquid spills, making it an indispensable tool for unexpected messes. Using the right equipment is crucial; never use a standard dry-only vacuum on water. Knowing how to use a wet/dry vacuum for water safely and efficiently turns a potential disaster into a quick task. To ensure a smooth cleanup, let’s cover what to prepare before you begin. What Should You Prepare Before Vacuuming Water? Proper preparation is key to efficient water cleanup. Before you start, make sure you have the right equipment on hand to manage the spill from start to finish. A little setup prevents scrambling for supplies mid-task and ensures you leave the surface as dry as possible. You will generally need three essentials: A Wet/Dry Vacuum: The main tool to remove most of the liquid. A Squeegee or Wiper: Helps guide water on hard surfaces to the vacuum nozzle making sure you pick up every drop. A Towel: Great for soaking up any leftover dampness or dealing with small scattered spots the vacuum might have missed. Safety & Setup Checks Confirm wet mode and install/remove filters and brush head per your model’s instructions. Keep cords and plugs away from standing water. Have a disposal plan. Use a floor drain, utility sink, or outdoor area permitted for gray water.   Dreame Take We believe you shouldn't have to follow up with extra tools, which is why we engineer our wet dry vacuums to deliver a complete clean. With features like an intelligent, self-lowering scraper that leaves floors virtually streak-free and powerful 22,000Pa suction to lift moisture effectively, our goal is to eliminate the need for a separate wiper or towel. The vacuum should do all the work, from spill to shine.   Step-By-Step Water Removal With a Wet Dry Vac Successful water removal follows a repeatable sequence: contain the perimeter, extract from the center, empty the tank, and finish the edges. Step 1. Contain the Spill by Securing the Perimeter Start by working around the spill's edges—along walls, baseboards, and around furniture. This pushes water toward the center instead of letting it seep into gaps. Keep the nozzle flat against the floor, using slow, overlapping strokes to create a dry "moat" that contains the spill for faster extraction.   Pro-tip To contain the spill better, place a folded towel along a baseboard to act as a temporary barrier and pull the vacuum nozzle inward from the towel. If you see water showing up again along a floor seam just change your approach angle and overlap your previous pass by at least a third to remove it.   Step 2. Extract Water from the Center with Slow Passes Once the perimeter is secure, move to the middle of the spill. Use deliberate, back-and-forth passes that slightly overlap to ensure consistent coverage. As the tank fills, an internal float will rise and cut off suction—a distinct change in the motor’s pitch is your signal to stop and empty the tank.   Pro-tip For deeper puddles, first squeegee to consolidate water, then vacuum. On large areas, work in zones—extract water from one section, empty the tank, and then move on to the next to avoid carrying a heavy, full tank across wet floors.   Step 3. Empty the Tank and Polish the Surface When suction stops or the motor pitch changes, empty the tank promptly to avoid spills. Dispose of the collected water in a floor drain or outdoors. Once the bulk of the water is gone, make a final "polish pass" over the area to lift any thin film of moisture from grout lines or seams. Step 4. Detail Edges and Tight Spaces For a truly dry finish, switch to a crevice tool for thresholds, under cabinet toe-kicks, and around appliance feet. Make light careful passes until the areas feel dry when you touch them. Keep in mind, a good nozzle seal works better than pushing down hard. Step 5. Speed-Dry to Finish the Job Even after visible water is gone, accelerate drying to protect floors and subfloors. Run fans and open windows if conditions permit; add a dehumidifier in humid rooms. Lift rugs/mats and use furniture coasters to protect legs. Check back after 30–60 minutes for any re-wicked moisture and repeat quick passes if needed.   Dreame Take Low furniture and tight corners shouldn't stand in the way of a perfect clean. We built our 180° lie-flat design into select Dreame wet dry vacuums for that exact reason. This feature enables the vacuum to glide effortlessly into cramped spaces, making it easy to clean hard-to-reach areas without disrupting your room's layout.   When to Use Wet Dry Vacuum With Liquid Spills Scenario Wet Dry Vac? Add-ons Escalate When… Clean water spill Yes Blot → vacuum → fans Subfloor/padding is soaked Sugary drinks Yes Extract liquid → Rinse with water & blot → Vacuum dry Odor/stickiness persists Pet urine (fresh) Yes Vacuum liquid first → Treat with enzyme cleaner Persistent odor/large area Small appliance leak Yes Fix source; dehumidifier Multi-room saturation Unknown/contaminated water No Isolate area Call certified pros Advanced Water Vacuuming Scenarios To handle more complex cleanups, tweaking your approach can make a big difference. Here are some tips to tackle tricky situations well. Large Areas Split the area into easy-to-handle sections using barriers or natural dips. Begin with the soggiest part, and drain the container right away when you notice the float-shutoff signal (a shift in engine sound) before you move on to the next area. Multi-Room Layouts Go room by room starting with the wettest spot and ending with the driest. Keep a dump site close and stick to a strict "extract → empty → return" pattern to stop overfilling and spills. Heavy Obstacles & Tight Geometry Switch to a crevice tool for areas like toe-kicks, thresholds, and gaps around appliances. Make multiple light, overlapping passes in these tight spaces until a fingertip check confirms the surface is dry. FAQs about Cleaning Up Water & Spills Q: Can you use a regular vacuum for water? A: No, never use a regular vacuum for water. It can cause electrical shock and permanent motor damage. Only vacuums specifically labeled as "wet/dry" models are designed for safe liquid cleanup. Q: Can you vacuum other liquids with wet and dry vacuums? A: Yes, wet/dry vacuums are built to handle various liquids like juice, milk, and even kitchen oil. Check your manual for restrictions: flammables/solvents are unsafe, and foamy/oily liquids may need a defoamer and extra hose/tank cleaning. Q: Can you vacuum water from the carpet? A: It is critical to check your model's specific guidelines. Many all-in-one wet/dry vacuums are designed exclusively for hard floors and should not be used on carpets, as this can damage the machine's brush mechanism and the carpet itself. Always refer to the user manual before tackling wet messes on soft surfaces. Our vacuums are optimized for superior cleaning on sealed hard floors. Q: What can you do if your vacuum smells bad after use? A: Odors often result from bacteria in leftover debris and moisture. You should empty and rinse the tank after each use. Many new vacuums help prevent smells with features like high-temperature self-cleaning, hot air drying, and specialized components like an antibacterial deodorizer in the used water tank. This module helps neutralize odors and inhibit microbial growth in the collected dirty water. Conclusion From preparing your space to executing the final "polish pass," you now have a complete, water-focused roadmap for wet dry vacuum use. The right technique—contain, extract, empty, detail, and speed-dry—protects your floors, prevents odors, and cuts cleanup time dramatically. With a methodical approach, you can handle anything from a small puddle to a multi-room incident confidently and safely.  Ready to find the perfect tool for the job or learn more cleaning strategies? Explore Dreame's innovative lineup of wet/dry vacuums and discover more expert usage tips on our blog to keep your home pristine.
View more
How to Connect Your Robot Vacuum to Wi-Fi (Step-by-Step Guide)

How to Connect Your Robot Vacuum to Wi-Fi (Step-by-Step Guide)

Getting a new robot vacuum is exciting, but it only reaches its full potential once connected to Wi-Fi. A Wi-Fi connection lets you control cleaning schedules, set no-go zones, and get the most out of the robot vacuum cleaner app. Without it, you’re limited to basic manual functions. In this guide, we’ll walk you through how to connect a robot vacuum to Wi-Fi step by step. You’ll also learn how to troubleshoot common connection issues, explore what features you gain through the app, and see which Dreame models make setup easier. By the end, you’ll know exactly what to expect and how to get your robot vacuum running smoothly. Do Robot Vacuums Need Wi-Fi? Short answer: No. Your robot vacuum can clean without Wi-Fi. You can press the start button, and it will handle basic cleaning. However, operating without Wi-Fi is like having a sports car you can only drive in first gear; you’re missing out on all the best features! Connecting to Wi-Fi enables: App Control: Start, stop, and customize cleaning remotely from your phone. Scheduling: Set daily or weekly cleaning times so your floors stay spotless. Smart Mapping & Cleaning Reports: See where your vacuum has been and what’s left. Set no-go zones, and select specific rooms to clean. Voice Commands: Use Alexa, Google Assistant, or Siri to control your vacuum hands-free. Firmware Updates: Automatic updates keep your vacuum running smoothly and can even add new features over time. If you’ve ever wondered, are smart vacuums worth it? The ability to connect to Wi-Fi and unlock features like detailed maps and automatic updates is one of the reasons many people choose them. Read more in our blog: Are Smart Vacuums Worth It? Your Complete Guide to Smart Vacuum Cleaners in 2025.   Pro-tip If you're waiting on a new router or other delays, remember you can still run manual cleans to keep your floors maintained while you sort out the Wi-Fi connection.   Step-by-Step Guide: How to Connect a Robot Vacuum to Wi-Fi While the exact steps can vary slightly by brand, the general process for connecting your robot vacuum to Wi-Fi is similar across most models. Before diving in, here’s what to prepare: Network Band: Make sure you have a 2.4 GHz Wi-Fi network. Most robot vacuums don’t support 5 GHz or 6 GHz networks. Your router may have a single name (SSID) for both bands; if you have trouble, check your router settings to create a separate 2.4 GHz network temporarily. Security Mode: Set your Wi-Fi security to WPA2-PSK or WPA2/WPA3 mixed. Avoid a WPA3-only setup. SSID Basics: Use a simple network name. Avoid hidden SSIDs, emojis, or special characters like apostrophes. Phone Prep: Connect your phone to the same 2.4 GHz SSID. Turn on Bluetooth. Disable any VPNs or Apple Private Relay temporarily, as they can interfere with the device discovery process. Router Quirks: If your router uses one name for both 2.4 GHz and 5 GHz, temporarily split them (like “Home-2G” and “Home-5G”) for setup. For Dreame robot vacuums, this is done through the intuitive Dreamehome App. Steps to Connect: Download the App: For Dreame models, search for the "Dreamehome" app on the iOS App Store or Google Play Store and install it. Create an Account: Open the app and register for a new account or log in. Power On Your Vacuum: Ensure your robot vacuum is powered on and placed near your Wi-Fi router during setup. Add a Device: Tap the "+" or "Add Device" button within the app. The app will typically guide you through the process. Select Your Model: Choose your specific robot vacuum model from the list. Enter Wi-Fi Credentials: You will be prompted to select your 2.4 GHz Wi-Fi network and enter its password. Follow In-App Instructions: The app will now communicate with your vacuum (usually via Bluetooth first) to transfer the Wi-Fi details. You may hear a voice prompt or chime from the vacuum confirming it's connecting. Connection Success: Once the process is complete, the app will show a success message, and your vacuum will appear on the main dashboard. You can now start exploring its features! For detailed, model-specific instructions, always refer to the Dreamehome App Guide. 2.4 GHz vs. 5 GHz for Robot Vacuum Connectivity You might be wondering why your advanced robot vacuum prefers the older 2.4 GHz Wi-Fi standard. The reason is simple: range and compatibility. 2.4 GHz: Slower speed, longer range, and better penetration through walls and floors. Compatible with nearly all robot vacuums. Since your robot vacuum needs to stay connected as it moves around your entire house, this extended range is crucial. 5 GHz: Faster, but shorter range, making it better for stationary devices like laptops and smart TVs. Most vacuums don’t support it. If your phone defaults to 5 GHz, switch to 2.4 GHz before setup. Some routers let you separate the two networks; others require a temporary tweak in router settings.   Pro-tip Once setup is complete, you can re-enable band steering if your router supports it.   How to Reset and Reconnect (When You Change Routers or Wi-Fi Names) Moved to a new home or changed your Wi-Fi password? No problem. You’ll need to reset your vacuum’s Wi-Fi settings and go through the connection process again. The reset process varies by model. For many Dreame vacuums, you can reset the Wi-Fi by: Pressing and holding the Clean and Dock buttons simultaneously for about 3 seconds. You will hear a voice prompt saying, "Wi-Fi reset. Waiting for network configuration." Once the power indicator light blinks, the Wi-Fi has been reset, and the vacuum is discoverable in the app again.   Important Resetting may erase saved maps. If your model supports export/backup, save maps before resetting.   Extra Tip: Preparing for Router Changes If you know you’re upgrading your router, plan ahead: Save or export maps in the Dreamehome app. Keep your old SSID and password the same on the new router for a seamless transition. Have your phone ready for quick re-pairing if needed. Another overlooked step is placement. Keep your robot dock within a good range of your router. Walls and thick furniture can weaken the signal. A stable connection ensures better map saving and faster updates. Best Wi-Fi-Connected Dreame Robot Vacuums in 2025 Choosing the right model can make setup and daily cleaning even smoother. Dreame offers a range of powerful models that excel with app control and smart features. Model Best For Key Features Dreame X50 Ultra Large homes & premium users AI mapping, auto mop washing, and self-emptying Dreame L50 Ultra Busy families Strong suction and smart navigation Dreame L40s Ultra Apartments & small spaces Compact design and affordable smart features The Dreame X50 Ultra was recently reviewed in detail as part of our blog: Dreame X50 Ultra Review. Check it out to see just how much difference Wi-Fi and AI mapping can make for day-to-day living. Unlock Smarter Cleaning with the Dreamehome App The Dreamehome App is the brain behind the brawn. It’s where you’ll manage everything from daily schedules to advanced home mapping. Download it for Android or iOS to turn your robot vacuum into a truly intelligent home appliance. The app enables: Remote Access: Control cleaning from anywhere. Customized Maps: Create no-go zones, multi-floor maps, and room-specific cleaning. Reports and Alerts: See when your vacuum finishes or when it needs maintenance. Integration with Dreame Ecosystem: Connect with other Dreame devices for unified home care. FAQs 1. Do all robot vacuums require Wi-Fi? No. They can clean without Wi-Fi but lose advanced features. 2. Will a Wi-Fi extender work with a robot vacuum? Yes, as long as the extender broadcasts a 2.4 GHz signal. 3. Which robot vacuums work with 5 GHz Wi-Fi? Most don’t. Check model specs carefully. Dreame models currently require 2.4 GHz. 4. Is there a robot vacuum that doesn’t need Wi-Fi? Yes, but they won’t offer app control, smart maps, or updates. 5. Can I use the same app for multiple Dreame devices? Absolutely. The Dreamehome app supports multiple devices so you can manage vacuums, mops, and more in one place. Final Thoughts Learning how to connect a robot vacuum to Wi-Fi is simple once you know the steps. The payoff is huge: smarter cleaning, remote control, and a home that takes care of itself. With Dreame’s lineup of Wi-Fi-connected vacuums and the Dreamehome app, staying on top of messes has never been easier. If you’re still deciding which robot vacuum is best for your space, our blogs on small-space robot vacuums and dust-busting vacuum comparisons are great places to start. A few extra minutes spent learning setup now will save you countless hours of cleaning later.
View more
How Often to Replace a Vacuum: Lifespan, Signs, and Smarter Alternatives

How Often to Replace a Vacuum: Lifespan, Signs, and Smarter Alternatives

You're vacuuming your living room, when suddenly, you notice something strange. You pass over the same line of crumbs three times, but they’re still there. You check the filter, the brush, even the hose. Nothing’s obviously wrong, but the suction’s weak, and now the motor sounds a little off too. Is it just a clog? Do the vacuum batteries need replacing? Or is your vacuum on its last legs? Knowing when to repair or replace a vacuum can be tricky. Some problems creep up quietly, while others are impossible to ignore. The right choice often depends on your home’s size, the kind of messes you deal with, and how often you clean. This guide breaks down the most important signs that it’s time to replace your vacuum and introduces smarter, longer-lasting options that can improve your cleaning routine and your home's air quality. Let’s dive in. When to Replace a Vacuum Cleaner? Most upright and stick vacuums last about 5 to 8 years. Robot vacuums can run even longer with regular care. If your vacuum falls into that age range, start watching for red flags like weak suction or repeated clogs. As a rule of thumb: If the cost of repairs is more than half the price of a new machine, consider upgrading. If performance drops noticeably, even after cleaning filters and brushes, it’s likely time for a replacement. If your lifestyle changes, like adding pets, having children, or moving to a bigger home, you may need new vacuum features sooner than expected. Curious how long most vacuums actually last? Dreame explains it well in How Long Should a Vacuum Cleaner Last. 6 Signs You Should Get a New Vacuum You don’t need to guess. These signs tell you a vacuum has reached the end of its useful life: Loss of Suction If your vacuum takes multiple passes to pick up debris, the motor or belts may be worn out. A working vacuum should clean in one or two passes. Frequent Clogs and Blockages Occasional clogs happen, but frequent ones signal airflow problems. Quick fixes like replacing filters or belts may help, but recurring clogs often point to larger issues. Strange Noises or Odors Grinding, squealing, or burning smells are warning signs. They usually mean internal parts are failing, and continued use could damage floors or even pose a safety risk. Overheating If your vacuum shuts off or feels hot during use, the motor may be overworked. Blocked airflow or worn belts can also cause overheating, leading to permanent damage if ignored. Outdated Technology Machines older than eight years may lack HEPA filters, efficient brushes, or smart navigation. Newer vacuums clean better, save energy, and trap allergens more effectively. Housing/Flooring Changes The vacuum that worked fine in a small apartment may not keep up in a larger home. Changes in flooring or daily messes can make an upgrade worthwhile. Should You Replace Parts or the Whole Vacuum? Sometimes replacing a part adds years of use. Before discarding a vacuum, check whether a simple fix will do. Part Clean/Replace Frequency Tips HEPA Filter Clean monthly; replace every 6–12 months A dirty filter reduces suction and may release allergens back into the air. Consider upgrading to a HEPA filter if allergies are a concern. Brush Roll Remove hair monthly; replace annually Worn bristles can’t agitate carpet fibers effectively, leading to poor pickup. Belt Inspect every 6 months; replace if cracked Loose belts reduce brush speed and suction power. Battery (Robot Vac) Check after 2 years; replace if runtime drops A weak battery reduces cleaning coverage. Proper charging habits extend lifespan. Dust Bin / Bag Empty after each use; replace bag weekly or as needed Overfilled bins stress the motor and cause clogs.   For more on keeping your vacuum running, read 10 Expert Tips to Extend Your Robot Vacuum’s Lifespan. Why Change a Vacuum Cleaner if It Still Works? A vacuum may turn on but still fail at its job. Here’s why replacing it can make sense: Poor Cleaning Performance: If it takes too long or leaves debris behind, it’s time to upgrade. New Dreame vacuums with soft roller brushes clean more efficiently in fewer passes. Frequent Breakdowns or Repairs: Constant fixes get costly. Modern models use stronger parts that hold up better over time. Modern Features That Save Time: Robot vacuums map your home and empty themselves. Wet dry vacuums, like the Dreame H15 Pro Heat, vacuum and mop at once. Health Benefits: New models include sealed HEPA filtration that traps fine dust and allergens, especially helpful for households with pets or allergy concerns. Life Changes: Babies, pets, and bigger homes bring new cleaning challenges. Dreame’s robot vacuums and wet dry models adapt to daily needs and reduce manual work. Upgrade Smarter: New Vacuums That Last Longer Replacing a vacuum isn’t just about fixing an old machine. It's a chance to upgrade to smarter, more powerful tools that fit your evolving needs. Dreame’s lineup includes robot and wet dry vacuums built for long-term performance and low maintenance. Wondering if the upgrade is worth it? Take a look at Are Smart Vacuums Worth the Investment. Robot Vacuums Robot vacuums offer advanced navigation, self-emptying systems, and hands-free cleaning that adapts to any home. Whether you live in a studio or a multi-level house, there’s a match. X50 Ultra: Dreame’s top-tier robot vacuum. It features powerful suction, a soft rubber brush for precision, and a self-emptying dustbin. Ideal for homes with pets and lots of floor traffic. L50 Ultra: Known for its slim dock and multi-floor mapping, the L50 Ultra is perfect for apartments and tight spaces. It transitions easily between surfaces and stores away neatly. L40 Ultra: A versatile option with strong suction, intuitive app control, and quiet operation. It’s great for busy households that want daily, low-fuss cleaning. D20 Plus: Compact but effective, this model is perfect for smaller homes or those new to robot vacuums. It handles daily debris while remaining budget-friendly. Each robot model cuts down on manual vacuuming, mapping your space and cleaning on schedule so your floors stay spotless with minimal effort. Wet Dry Vacuums For sticky messes, spills, and deep cleaning, wet dry vacuums offer a powerful solution that goes beyond dust pickup. H15 ProHeat: A premium option with a heated brush roll that lifts dried-on spills while mopping and vacuuming in one go. It also features automatic self-cleaning and drying, reducing odor and mold risk. H14 Pro: Slightly more compact, the H14 Pro still delivers strong suction, dual water tanks, and smart dirt detection. It’s ideal for high-traffic areas and kitchens. For a broader look at the cleaning lineup, explore Dreame’s complete Vacuum & Floor Care Collection and discover models tailored to every home size and cleaning style. What to Do With Old Vacuums Before tossing your old vacuum in the trash, consider more sustainable options: Donate or Recycle: Many organizations accept working appliances for donation. Dreame’s guide on how to donate a vacuum cleaner explains where to drop off or schedule pick‑ups. Trade‑In Programs: Some retailers offer trade‑in credits when you upgrade to a new model. Check local stores or manufacturer promotions. Repair and Repurpose: If the motor works, your old vacuum could be used in a garage or workshop for sawdust and small debris. Responsible disposal reduces waste and helps others benefit from a machine you no longer need. FAQ How long should a vacuum last? Most vacuums last around 6 to 8 years, though high-quality ones can last longer with proper care. If your machine still performs well and parts are available, it may not need replacing yet. Is it cheaper to repair or replace? If repairs are minor and your vacuum is under 5 years old, fix it. But if the motor fails or repairs cost more than half the price of a new vacuum, replacement makes more sense. Which is better for pets, robot vacuum or wet dry vacuum? Use both: robot vacuums handle daily pet hair pickup effortlessly. Wet dry vacuums are better for muddy paw prints and spills. Should I replace my vacuum if it doesn’t have a HEPA filter? If allergies or pets are an issue, upgrading to HEPA filtration helps trap fine dust and allergens. If your current vacuum allows, you might only need to upgrade the filter—not the whole machine. Conclusion: When Is The Right Time to Replace Your Vacuum? Choosing when to replace a vacuum isn’t just about age. It’s about performance and lifestyle. If your machine is older than eight years, struggles with suction, or emits odd smells, it may be time for an upgrade. Replacing parts can help, but if repairs are frequent or expensive, a new vacuum is a better investment. Ready for a smarter clean? Explore Dreame’s robot and wet dry vacuums, pair with the Dreamhome app, and let your floors take care of themselves—so you don’t have to.
View more